Unity5 with Photon
在前次寫完參加 Photon 的說明會的感想後,在幾個禮拜前,按照台灣代理商的官方部落格的教學文章,嘗試弄一次連線測試的專案,記錄那時候做的筆記。
Setup Environment
Photon App-ID
採用 Photon Real-time 免費方案,可以同時支援連線數 20 個,該方案不能加入伺服器客製化邏輯 Plugins,但對於測試專案來說,不能加入伺服器邏輯好似也沒有什麼差別。
在 Photon 官方網站申請帳號,建立 Photon Application,取得 App-ID。
Photon Unity Networking (PUN)
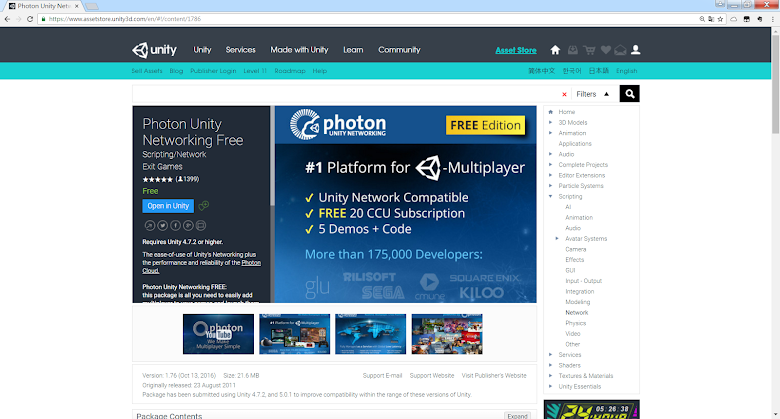
在 Unity Asset Store 中,下載 Photon Free,並且加入 (Import) 到 Unity 專案中。
MenuItem > Windows > Photon Unity Networking > PUN Wizard 開啟 Wizard,初始化遊戲專案,把剛剛獲得的 App-ID 填入,並且設定 Photon Configs,主要是選擇日本伺服器 JP,完成環境設定。
Unity-chan
Demo 使用 Unity-chan 的 2D 資源,也到 Unity-chan 官方網站把所需的資源下載,並且加入到 Unity 專案中。
使用 Unity 5.5.0b6 來建立測試專案,Unity-chan 的資源都必須升級,除了使用 Unity 自動升級的功能以外,有些程式碼得手動調整,幸好測試專案只是需要美術資源而已,對於那些編譯或是無法正常運作的程式碼,就直接砍掉了。
Framework
使用 PhotonView 透過 Photon Clouds 同步兩個用戶端 (Client) 的角色資料,使用 PUN 所提供的 PhotonTransformView 以及 PhotonAnimatorView 來處理角色位移 (Transition Only) 以及動畫狀態 (Animator States) 的資料同步,來完成這次專案測試。
Unity with Photon
一開始先建立 Photon Manager,用來處理與伺服器連線的初始化,並且利用常常使用到的 Singleton Pattern,讓 Photon Manager 可以讓其他元件存取的到。
using UnityEngine;

public partial class PhotonManager : Photon.PunBehaviour
{
   public static PhotonManager Singleton
   {
      get
      {
         return instance;
      }
   }

   static PhotonManager instance;

   void Awake()
   {
      if (instance != null)
      {
         DestroyImmediate(gameObject);
         return;
      }

      DontDestroyOnLoad(gameObject);
      instance = this;
   }

   void Start()
   {
      // 連線初始化
     PhotonNetwork.ConnectUsingSettings("UnityChanPUN_v1.0");
   }
}
然後根據流程以及 Photon 設計架構,處理與遊戲大廳連線 (ConnectedToMaster) 以及連線到房間的函數以及事件 (OnJoinedRoom) 處理。
在這測試專案中,Client 必須等到與遊戲大廳連線後,才可以使用方向鍵選擇角色,完成選擇後按下 X 開始才與房間連線。
在 PhotonManager 處理 ConnectedToMaster 的行為,把事件丟出:
public partial class PhotonManager : Photon.PunBehaviour
{
   public event System.EventHandler MasterConnected;

   public override void OnConnectedToMaster()
   {
      if (this.MasterConnected != null)
      {
         this.MasterConnected(this, System.EventArgs.Empty);
      }
   }
}
在初始頁面撰寫程式碼,控制流程,監聽 PhotonManager.MasterConnected 的事件,當完成大廳連線後,便可選擇角色,直到玩家按下 X 按鍵後加入房間:
using UnityEngine;

public class StartPage : MonoBehaviour
{
   public CharacterSelector selector;
   public GameObject info_connecting;
   public GameObject info_start;

   void Awake()
   {
      // 初始化控制項
      this.selector.AllowSelect = false;
      this.info_connecting.SetActive(true);
      this.info_start.SetActive(false);
   }

   void OnMasterConnected(object sender, System.EventArgs e)
   {
      // 大廳完成連線
      this.selector.AllowSelect = true;
      this.info_connecting.SetActive(false);
      this.info_start.SetActive(true);
   }

   void Start()
   {
      PhotonManager.Singleton.MasterConnected += this.OnMasterConnected;
   }

   void Update ()
   {
      if (this.selector.AllowSelect && Input.GetKeyDown(KeyCode.X))
      {
         // 加入房間
         PhotonManager.Singleton.JoinGameRoom(selector.Current);
      }
   }
}
處理 JoinGameRoom 的函數實做,設定連線參數以及名稱連線,
public partial class PhotonManager : Photon.PunBehaviour
{
   public void JoinGameRoom(string characterName)
   {
      this.CharacterName = characterName;

      RoomOptions options = new RoomOptions();
      options.MaxPlayers = 20;
      PhotonNetwork.JoinOrCreateRoom("Room", options, null);
   }
}
處理完成房間連線的事件,載入另外一個場景,這裡與 Photon Taiwan 的教學文章不同,Unity5 以後已經沒有在支援 OnLevelWasLoaded,所以改成 UnityEngine.SceneManagement.SceneManager.sceneLoaded 的事件處理:
public partial class PhotonManager : Photon.PunBehaviour
{
   public override void OnJoinedRoom()
   {
      SceneManager.sceneLoaded += this.OnLevelFinishedLoading;
      PhotonNetwork.LoadLevel("Stage");
   }

   void OnLevelFinishedLoading(Scene scene, LoadSceneMode mode)
   {
      SceneManager.sceneLoaded -= OnLevelFinishedLoading;

      // 若不在 Photon 的房間內,則網路有問題
      if (!PhotonNetwork.inRoom)
         return;

      // 建立玩家的控制實體
      var charName = this.CharacterName;
      var charPos = new Vector3(-8.0f, 4.5f, 0);
      var charRot = Quaternion.identity;
      PhotonNetwork.Instantiate(charName, charPos, charRot, 0);
   }
}
與 Photon 溝通的主流程程式碼大概是這樣,剩下的是 PhotonNetwork.Instantiate 的 Prefab 物件的設定。
Photon Prefab
PhotonNetwork.Instantiate 所初始化的 Prefabs 必須放置在 Resources 資料夾中,並且設定 Photon View,決定哪些資料需要被同步。
在這次測試專案中,每個角色各自有自己的 Prefab,並且設定 Photon View,同步角色 Transform 以及 Animator states:
另外處理 Input 來控制角色移動的組件 PlayerMovement 也跟著調整,該組件接收輸入調整 Rigibody2D 的參數,使用 Unity 物理引擎來完成角色的移動。PlayerMovement 改繼承 Photon.PunBehaviour:
public partial class PlayerMovement : Photon.PunBehaviour
{
   ...
}
Start 時,檢查這一個 PhotonView 是否為本機所建立的,若是其他玩家建立的,則關閉 Rigibody2D 的運作,不讓物裡引擎控制 Rigibody2D 的位移旋轉等,其 Transform 的位移將會由 PhotonTransformView 來同步伺服器資料來控制處理:
public partial class PlayerMovement : Photon.PunBehaviour
{
   void Start()
   {
      if (!this.photonView.isMine)
      {
         this.rig2d.isKinematic = true;
      }
   }
}
此外,Update 的行為也必須有所限制,玩家僅能控制自己所建立的 Photon instance:
public partial class PlayerMovement : Photon.PunBehaviour
{
   void Update ()
   {
      if (!this.photonView.isMine)
      {
         return;
      }

      // ... Control Code
   }
}
大致上這樣就完成了大半,雙開遊戲,可以看見兩個角色經由 Photon Server 同步角色資料。
完整專案請見 Github 或是開啟 WebGL 展示。
簡單的感想
使用 Photon 來進行資料同步算是相當簡單快速,基礎的 Transform & Animator 資料同步功能都已經有實做。要同步其他資料,自訂自己的資料 View 也不是不可能,可以讓開發者專注在其他開發工作上。
接下來應該是得研究如何寫 Server code,開發處理伺服器邏輯資料的 Photon plugins 了。寫安全的網路應用最重要概念,永遠不要相信用戶端的資料,伺服器必須有自己的一套邏輯運算,必須檢查驗證所有用戶端傳入的資料,這是一個非常大的坑。


沒有留言: